📦 D-Jà Vue without Docker
📦 Running the 🦄 backend without docker
Requirements:
- Git
- Python +3.9 (for the backend)
- Node JS +14 (for the frontend - in the next step)
- A shell (it can be a linux terminal, a WSL Terminal on Windows or a PowerShell), ⚠️ PowerShell might have few differences in the commands
TIP
You can use any Python version, however, in an ideal world it's better using locally the same Python version that will be used on Production. That's why you were prompt to choosed one. It's possible to check the prod version (and change it when necessary) by openning the Dockerfile.
Let's use the twitterclone project created in the former step, it's necessary enter inside the project root folder
cd twitterclone/cd twitterclone/Then let's create a python virtual environment for the backend and install the dependencies:
WARNING
⚠️ Don't forget to activate the environment (source .venv/bin/activate), by not doing it, the dependencies will be installed inside your machine rather than inside the virtualenv.
python -m venv .venv
source .venv/bin/activate
pip install -r requirements-dev.txt
python -m venv .venv
source .venv/bin/activate
pip install -r requirements-dev.txtThe Python environment is ready, you can use pip freeze and check all python dependencies installed. One good thing to do in this moment is to run the code style formatter which guarantee all the code are correct.
black twitterclone/black twitterclone/INFO
👉 Remember the name twitterclone/ can be different based on the answer you gave for the project name
Now, it's time to run the migrations, in other words, create the initial tables (based on the models) inside the database. Basically the models that Django has, such us, Users and Sessions and also the initial model for our project, in our case the Tweets table. The migrate django command will read all existing migrations and create the related tables.
INFO
For this project, the default database is SQLite due to we answered yes and 2 for the following prompts:
  ...
  [14/27] use_sqlite_local_env (no): yes
  ...
  [21/27] Select docker_usage
    1 - 🐳 use docker by default
    2 - 📦 use venv npm by default
    Choose from [1/2] (1): 2
  ...
...
[14/27] use_sqlite_local_env (no): yes
...
[21/27] Select docker_usage
1 - 🐳 use docker by default
2 - 📦 use venv npm by default
Choose from [1/2] (1): 2
...👉 If you need to change it to Postgres, don't forget you DON'T need to recreate the project again, you'll just need to change the .envfile
Run the migrations for all django apps:
./manage.py migrate./manage.py migrateAs soon as we have our database created, let's create a new user:
./manage.py createsuperuser
Usuário: admin
Endereço de email: admin@example.br
Password: **********
Password (again): **********
Superuser created successfully.
./manage.py createsuperuser
Usuário: admin
Endereço de email: admin@example.br
Password: **********
Password (again): **********
Superuser created successfully.Finally we can run the project locally:
./manage.py runserver
Watching for file changes with StatReloader
Performing system checks...

System check identified no issues (0 silenced).
October 17, 2023 - 08:39:10
Django version 4.1.7, using settings 'dashboardtarget.dashboardtarget.settings'
Starting development server at http://127.0.0.1:8000/
Quit the server with CONTROL-C.
./manage.py runserver
Watching for file changes with StatReloader
Performing system checks...
System check identified no issues (0 silenced).
October 17, 2023 - 08:39:10
Django version 4.1.7, using settings 'dashboardtarget.dashboardtarget.settings'
Starting development server at http://127.0.0.1:8000/
Quit the server with CONTROL-C.👉 Open your browser and access the http://localhost:8000, the application should be running
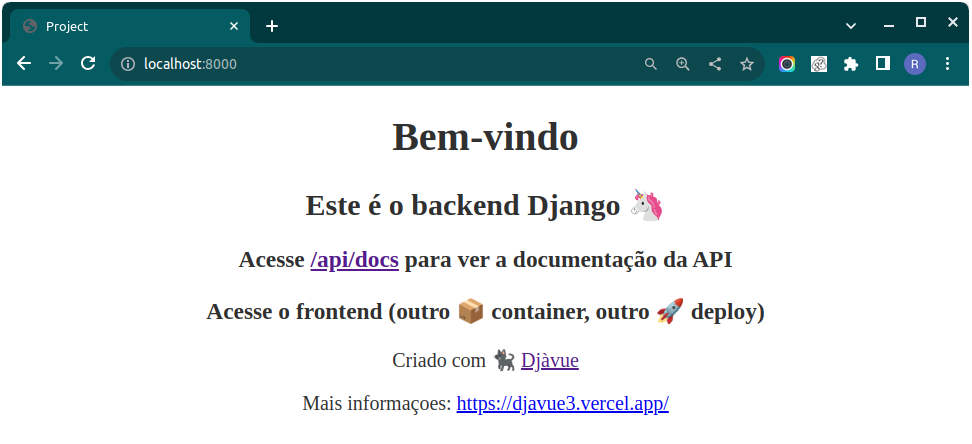
Other things that you can do at this point:
- Access the
http://localhost:8000/adminand after the login (using the user we created before) play with the Django Admin - Run the command
pytestand run all the backend tests - Run the command
./manage.py shell_plus --ipython --print-sqland run code such asTweet.objects.all()andTweet.objects.create(description="My first post using djavue")
INFO
👉 Remember the name Tweet in the code Tweet.objects.all() is the model name you answered and might be different for your case.
- Access the
http://localhost:8000/api/docsand check the API Documentation out - Access the
http://localhost:8000/api/posts/tweets/listand get the list of tweets using the backend api
INFO
👉 Again, the posts and tweets can be different based on your answers from app_name and model_name.
INFO
👉 If you got the response: {"detail": "Unauthorized"} for the http://localhost:8000/api/posts/tweets/list, you can access http://localhost:8000/admin/login/ and login using the user you created using the command createsuperuser and try it again.
📦 Running the ⚡️ frontend without docker
Requirements:
- Git
- Node JS +14 (for the frontend)
- A shell (it can be a linux terminal, a WSL Terminal on Windows or a PowerShell), ⚠️ PowerShell might have few differences in the commands
- The backend up running
Open a second terminal (the first one should be running the backend). Navigate inside the project folder root and then inside the frontend folder.
cd twitterclone/frontend/cd twitterclone/frontend/Use the npm to install all the frontend project dependencies. Note that those dependencies are listed inside the package.json file. Note also that the "environment" for this project, like the .venv folder created that stored all the dependencies for the backend, for frontend projects, this folder is node_modules and we don't need to create or inform anything. By default this folder will be created after running the following command.
npm installnpm installNow let’s run the frontend using vite
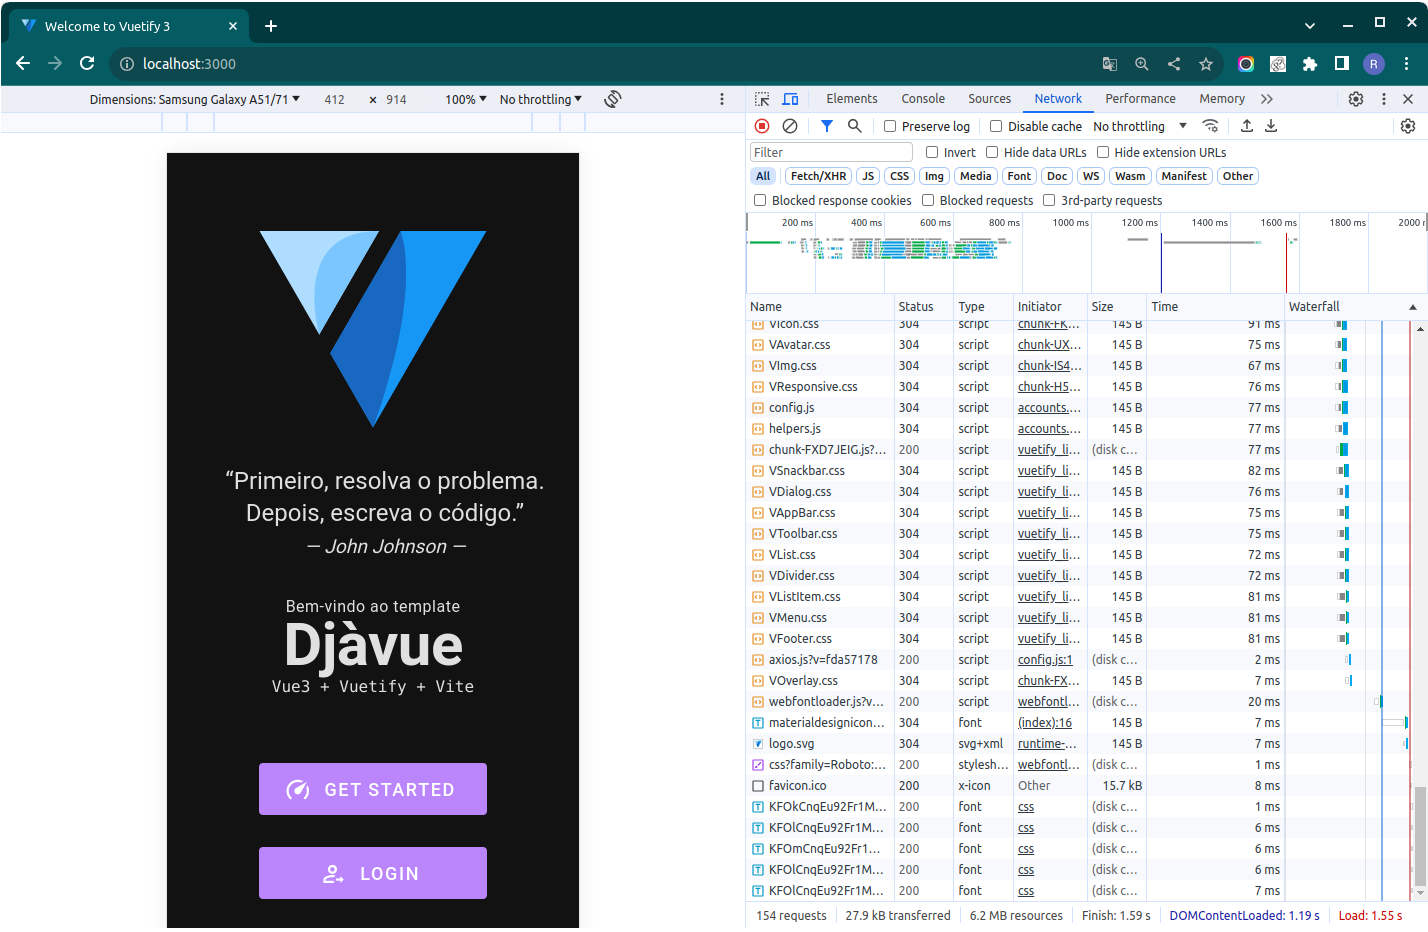
npm run dev
  VITE v4.4.11  ready in 669 ms
  ➜  Local:   http://localhost:3000/
  ➜  Network: use --host to expose
  ➜  press h to show help
npm run dev
VITE v4.4.11 ready in 669 ms
➜ Local: http://localhost:3000/
➜ Network: use --host to expose
➜ press h to show helpDONE!! 🎉🎉 The frontend is running
👉 Open your browser and access the http://localhost:3000 (or your machine IP + the port if with the --host) to request the frontend application! It should be running now!
INFO
📱 The D-Jà Vue template aims to be mobile first.
TIP
🌈 TIPS/TRICKS: Alternatively we can use the command npm run dev -- --host which will make the application available for your network, in this way you can use your machine IP address and access it from any other machine or mobile within the same WIFI network.
TIP
You can use any Node JS version, however, in a ideal world it better using locally the same Node JS version that will be used on Production. That's why you were prompt ans choosed one version. It's possible to check the prod version (and change it if necessary) by openning the frontend/Dockerfile.
Other things that you can do at this point:
- Use
npm run formatto run the code formatter (Prettier) and fix some possible formating style problems - Use
npm run lintto run the linter and check if some code is not following the rules - Use
npm run test:unitto run the frontend tests - Use
npm run buildwhich will generate thedistfolder that contains the final html+css+js to published